- FAQs
- March 7, 2022
How to create a dedicated Blog Page for your NFT Store
Blogs are immensely crucial to keep your audience engaged and informed. NFTICALLY has made it possible for the store owners to publish their own blogs on the store website. It will not only help to have an open channel for engagement but will also help in informing the audience about the latest developments happening in the NFT world and what new the store is offering.
Hence, if you have been exploring more options to get your blogs published on your NFT Store website, then you have landed at the right place.

Follow the below-detailed instructions on how to publish blogs on your store website:
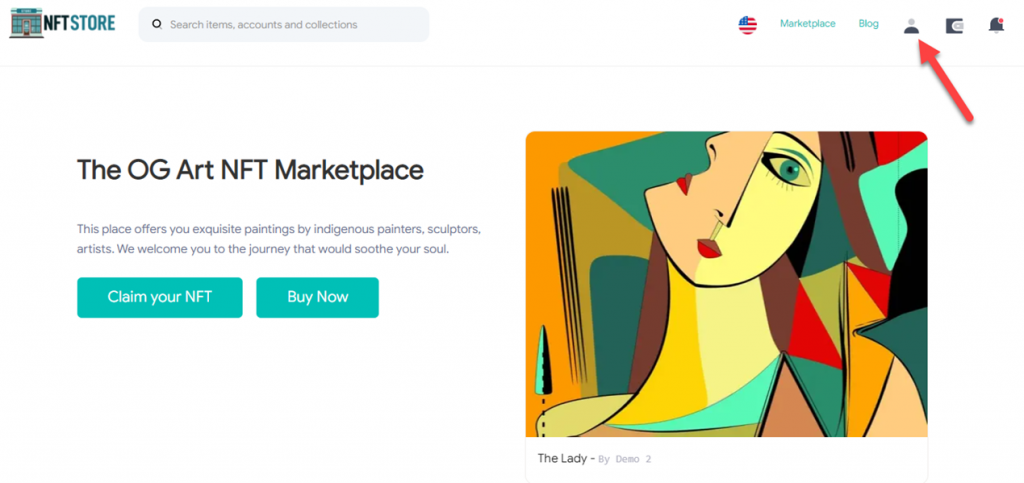
- Go to your NFT Store website and click on the third icon from the right hand side.
(Step 1)
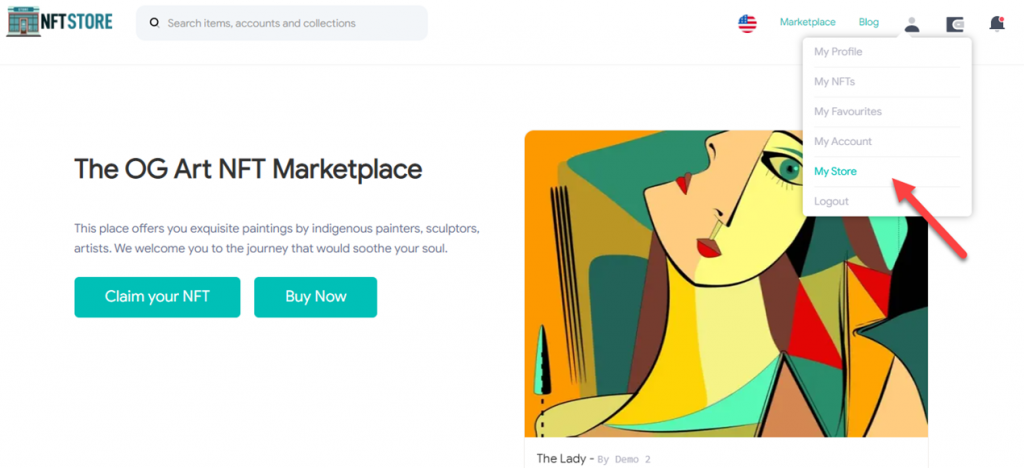
- Once you click on the icon, a drop down menu will appear. Choose ‘My Store Settings’.
(Step 2)
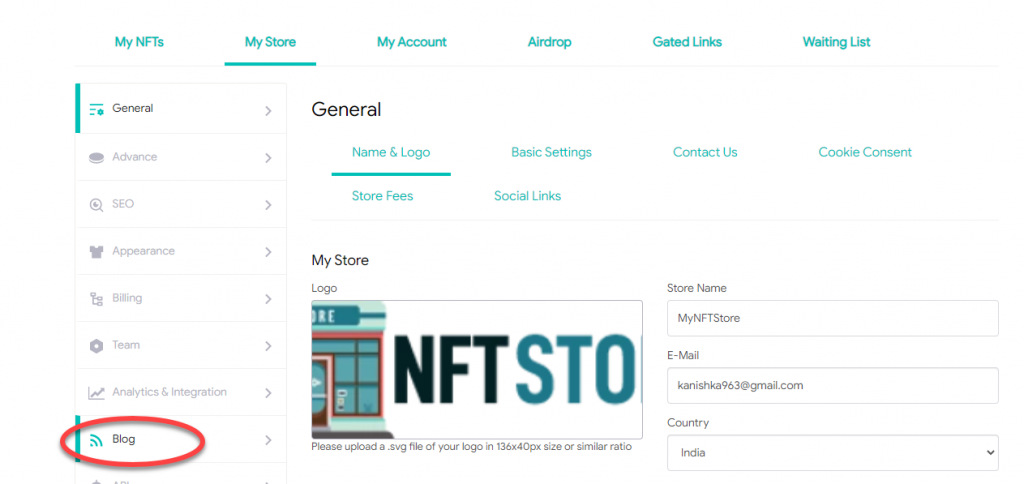
- The ‘My Store Settings’ tab will take you to the settings page of your NFT Store. When you land on this page, click on the fourth upper tab that says ‘Store Blog’.
(Step 3)
- Upon hitting the ‘Store Blog’ tab, the corresponding page will popup. Here you can start building on your blog post.
(Step 4)
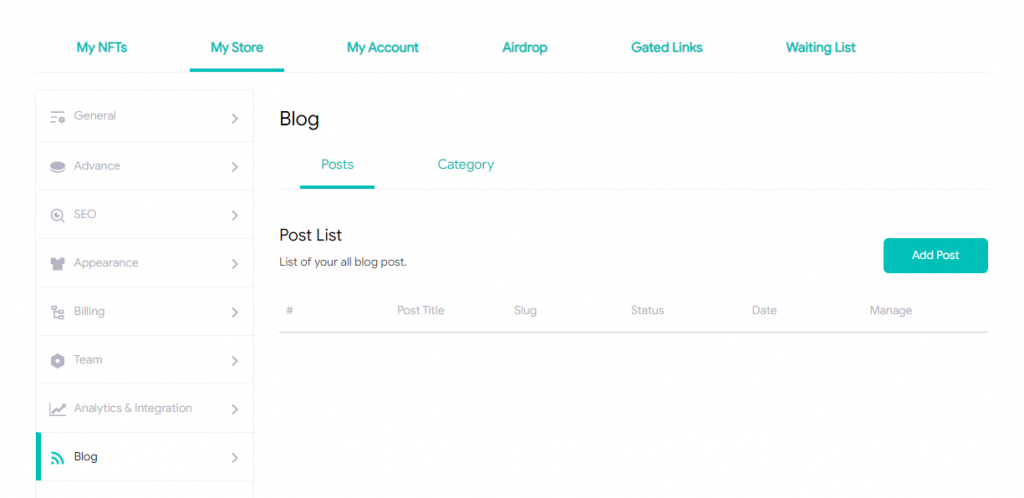
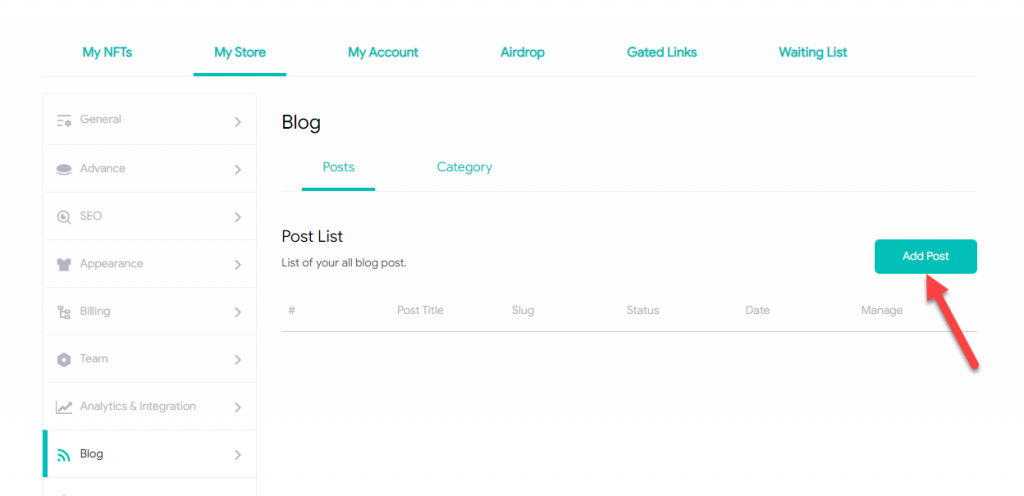
- On the Blog List page, click on the ‘Add New Post’ tab.
(Step 5)
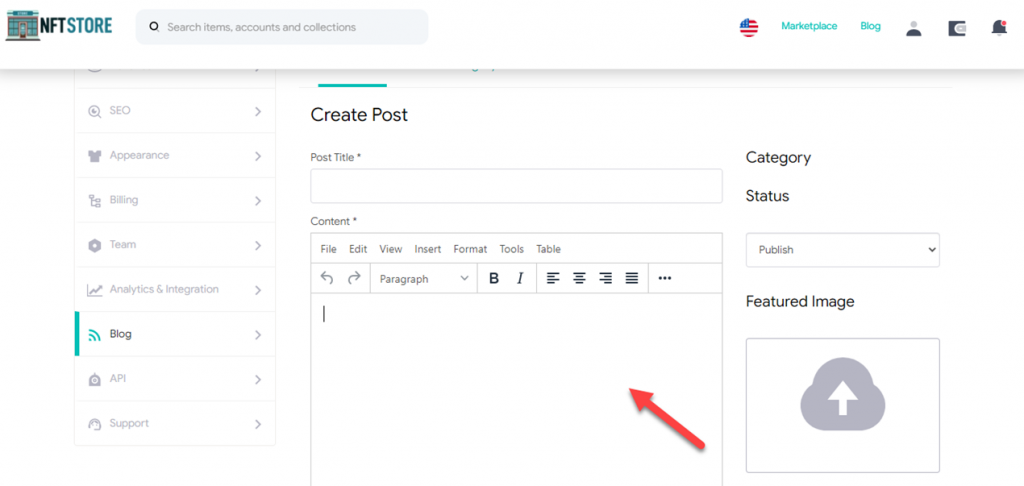
- When you hit the ‘Add New Post’ button, a page will appear which will prompt you to create a new blog post. Start building your blog by adding a title for the blog post.
(Step 6)

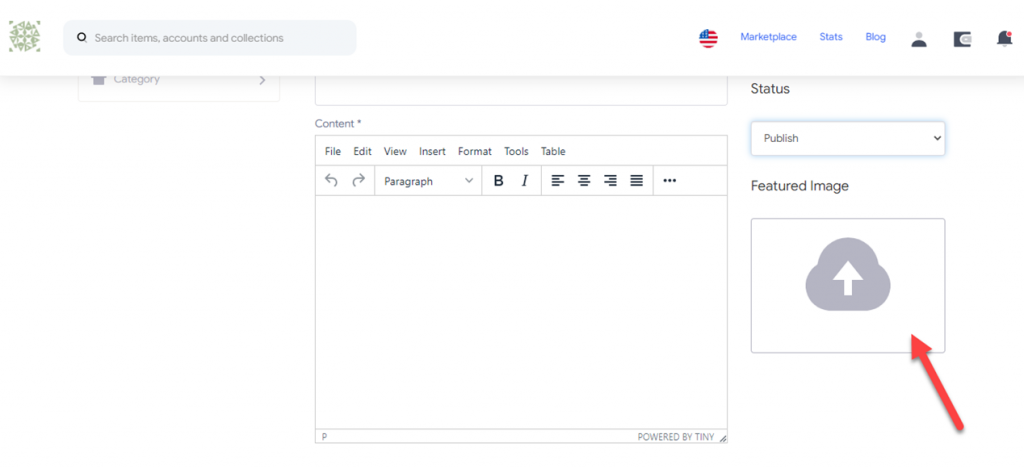
- The next step calls for you to add the content of the post. Now, you can either directly write the content in the space provided or you may simply copy and paste the desired content.
(Step 7)
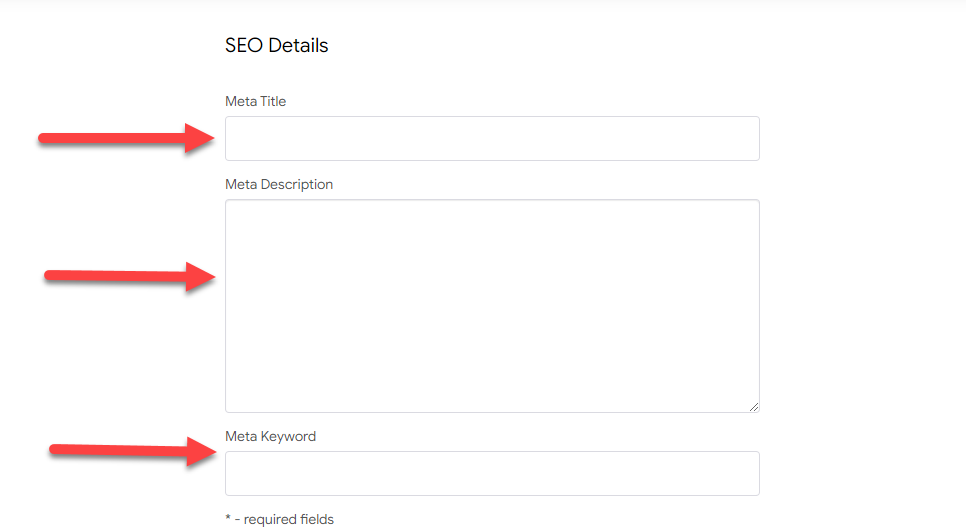
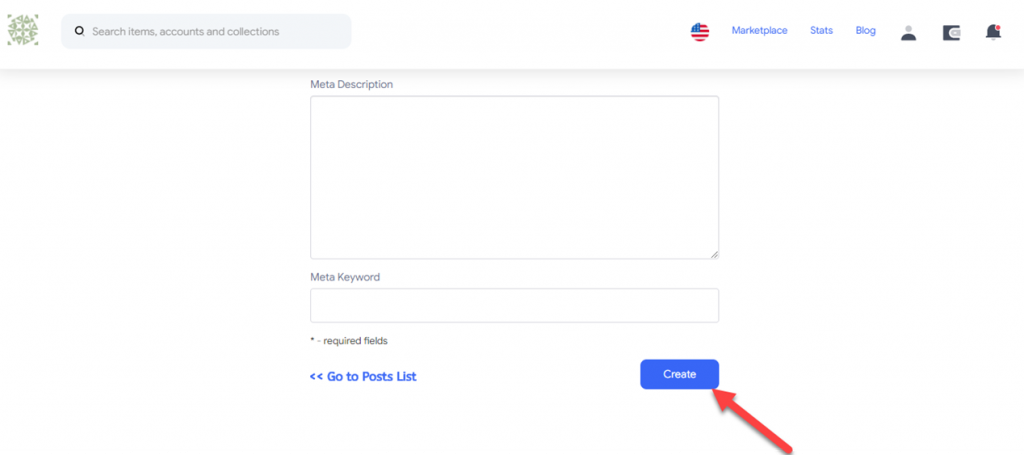
- The proceeding step will ask you to fill in the required information related to Search Engine Optimisation (SEO).
Start by adding a meta title for the blog. This title can be the same as the main title or it can be made SEO-friendly by adding suitable keywords.
The meta description section would require you to add a couple of sentences about the blog having relevant keywords.
Similarly, under the meta keywords section, you can add all the relevant and required keywords which would help in making the blog post more accessible and relevant.
(Step 8)
- Once you have filled in all the required information, now come to the publishing section of the blog. Once you are confident that the blog is ready to go live, hit the ‘Publish’ tab under Status. This will make your blog live on your Store website.
(Step 9)

Alternatively, if you have some more amendments to be made to the blog post, you can always save it as draft and can later publish it to make it live. Also, if you want to disable any live post, you may do so by changing its status to ‘Disable’.
- After selecting ‘Publish’, the next step would be to add a feature image to your blog. Click on the upward arrow under the ‘Featured Image’ section, and either choose an image from your device or you can also choose it from the cloud through Dropbox or Google Drive.
(Step 10)
- Once you have filled in all the mandatory fields, now is the time to hit the ‘Create’ button at the bottom of the page.
(Step 11)
- Once you have saved your blog post, you can always locate it on the Post List page.
(Step 12)
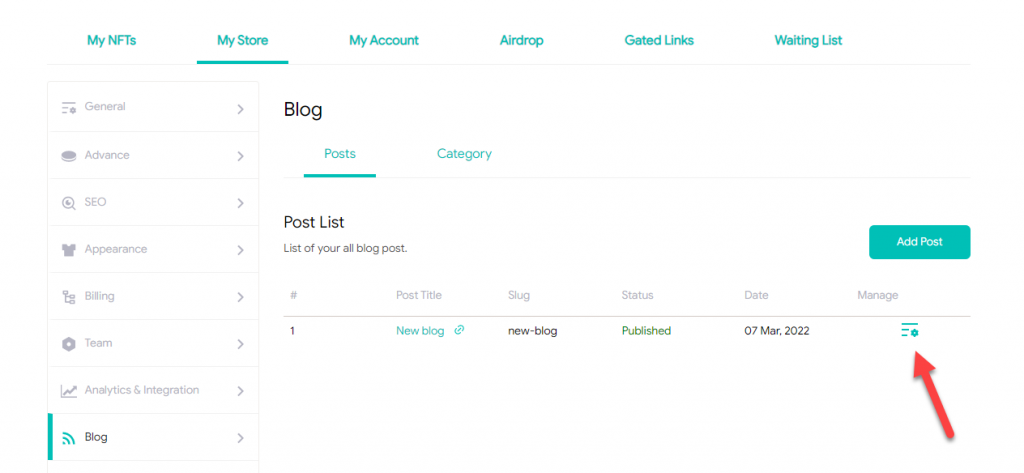
You can always manage your posts using the ‘Manage’ tool.
Blogs are an incredible way to connect with your audience virtually. Make sure you make the best of this amazing feature, crafted especially for you by NFTICALLY.
Related Posts
Can I Transfer NFTs to My Fans and Followers?
Nothing is more thoughtful than gifting NFTs to your followers and fans who are a part of this digital world or someone who is curious to learn more about this industry. NFTs are the simplest…
- June 23, 2022
Capture Activity on Your Store via Store Reports
Get real-time updated reports regarding all activities happening at your Marketplace with our Marketplace Report Generation feature. To download activity reports from your Marketplace, follow the steps below: Go to the third icon at the…
- April 25, 2022